Setting up an ARK SA server Windows VPS is one of the most flexible ways to host ARK: Survival Ascended in 2025, offering full control over server configuration, mods, and performance. This comprehensive guide walks you through every step—from choosing the right Windows VPS to installing SteamCMD, deploying the ARK SA dedicated server, and optimizing it for multiplayer gameplay.
Why Choose a Windows VPS for Your ARK SA Server?
A Windows VPS provides a virtualized, dedicated environment with guaranteed CPU, RAM, and storage resources. Unlike shared game hosting, a VPS grants you administrator-level access to the operating system, enabling advanced configurations such as custom startup scripts, automated backups, and third-party tool integration.
For ARK: Survival Ascended, a Windows VPS is ideal because the official dedicated server binary is natively supported on Windows Server editions. You can install SteamCMD directly, manage multiple server instances, and leverage the familiar Windows interface for remote desktop management.
Key Advantages of Windows VPS Hosting for ARK SA
- Full Root Access: Install any software, configure firewall rules, and manage services without restrictions.
- Scalable Resources: Upgrade RAM, CPU cores, and storage as your player base grows.
- Dedicated Performance: KVM virtualization ensures your server gets its allocated CPU threads and memory without interference from other users.
- Remote Desktop: Manage your server via RDP from any device, anywhere.
- Mod & Plugin Support: Install CurseForge mods, ASA+ plugins, and custom content without limitations.
At Nexus Games, our Windows VPS solutions are powered by the AMD Ryzen 9 7950X3D processor (16 cores / 32 threads, up to 5.7 GHz), DDR5 ECC RAM (32–128 GB), and NVMe SSD storage for ultra-fast read/write speeds. Each VPS runs on KVM virtualization, ensuring dedicated resources and stable performance even during peak player activity.
Prerequisites: Choosing the Right Windows VPS Specifications
ARK: Survival Ascended is resource-intensive, especially when running on Unreal Engine 5 with high-resolution textures, dynamic lighting, and complex AI. Before provisioning your VPS, evaluate the minimum and recommended specifications.
Minimum VPS Requirements for ARK SA
| Component | Specification |
| CPU | 4 cores (AMD Ryzen 9 7950X3D preferred) |
| RAM | 16 GB DDR5 ECC |
| Storage | 50 GB NVMe SSD |
| Bandwidth | 1 Gbps unmetered or 5 TB/month |
| Operating System | Windows Server 2019/2022 |
Recommended VPS Specifications for 20+ Players
| Component | Specification |
| CPU | 8 cores (AMD Ryzen 9 7950X3D) |
| RAM | 32 GB DDR5 ECC |
| Storage | 100 GB NVMe SSD |
| Bandwidth | 1 Gbps unmetered |
| Anti-DDoS | Game-grade protection (10+ Gbps mitigation) |
Nexus Games offers high-performance Windows VPS starting at $9.43/month, with options to scale up to 128 GB RAM and 16 dedicated CPU threads. All VPS plans include game Anti-DDoS protection, 1 Gbps network connectivity, and 24/7 technical support.

Step-by-Step: Installing ARK SA Server on Windows VPS
Once your Windows VPS is provisioned, follow these steps to deploy the ARK: Survival Ascended dedicated server using SteamCMD and configure it for public or private multiplayer access.
Step 1: Connect to Your Windows VPS via Remote Desktop
Open the Remote Desktop Connection application on your local PC (available by default on Windows, or download Microsoft Remote Desktop for macOS/Linux). Enter the IP address provided by Nexus Games, along with the administrator username and password sent to your email.
After logging in, you’ll see the Windows Server desktop. Disable Internet Explorer Enhanced Security Configuration (IE ESC) to simplify browser downloads:
Server Manager → Local Server → IE Enhanced Security Configuration → Turn Off for AdministratorsStep 2: Download and Install SteamCMD
SteamCMD is the command-line version of the Steam client, required to download and update dedicated server files. Download it from the official Valve website:
- Open a web browser and navigate to https://developer.valvesoftware.com/wiki/SteamCMD.
- Download the Windows version (steamcmd.zip).
- Extract the archive to
C:\SteamCMD\. - Run
steamcmd.exeonce to initialize and auto-update.
Step 3: Download ARK Survival Ascended Server Files
In the SteamCMD console, execute the following commands to download the ARK SA dedicated server:
login anonymous
force_install_dir C:\ARKServer
app_update 2430930 validate
quit
The app_update 2430930 command downloads the latest ARK: Survival Ascended dedicated server build. The validate flag checks file integrity. This process may take 15–45 minutes depending on your VPS network speed.
Step 4: Configure Server Settings (GameUserSettings.ini)
Navigate to C:\ARKServer\ShooterGame\Saved\Config\WindowsServer\ and open GameUserSettings.ini in Notepad or Notepad++. Key configuration parameters include:
[ServerSettings]
ServerName=My ARK SA Server - Powered by Nexus Games
ServerPassword=MySecurePassword
ServerAdminPassword=AdminPass123
MaxPlayers=50
DifficultyOffset=1.0
ServerPVE=False
AllowThirdPersonPlayer=True
ShowMapPlayerLocation=True
RCONEnabled=True
RCONPort=27020
QueryPort=27015
Port=7777- ServerName: Displayed in the server browser.
- ServerPassword: Leave empty for public access or set a password for private servers.
- MaxPlayers: Adjust based on your VPS RAM (16 GB = ~20 players, 32 GB = 50+).
- RCONEnabled: Allows remote administration via tools like ARK RCON or Discord bots.
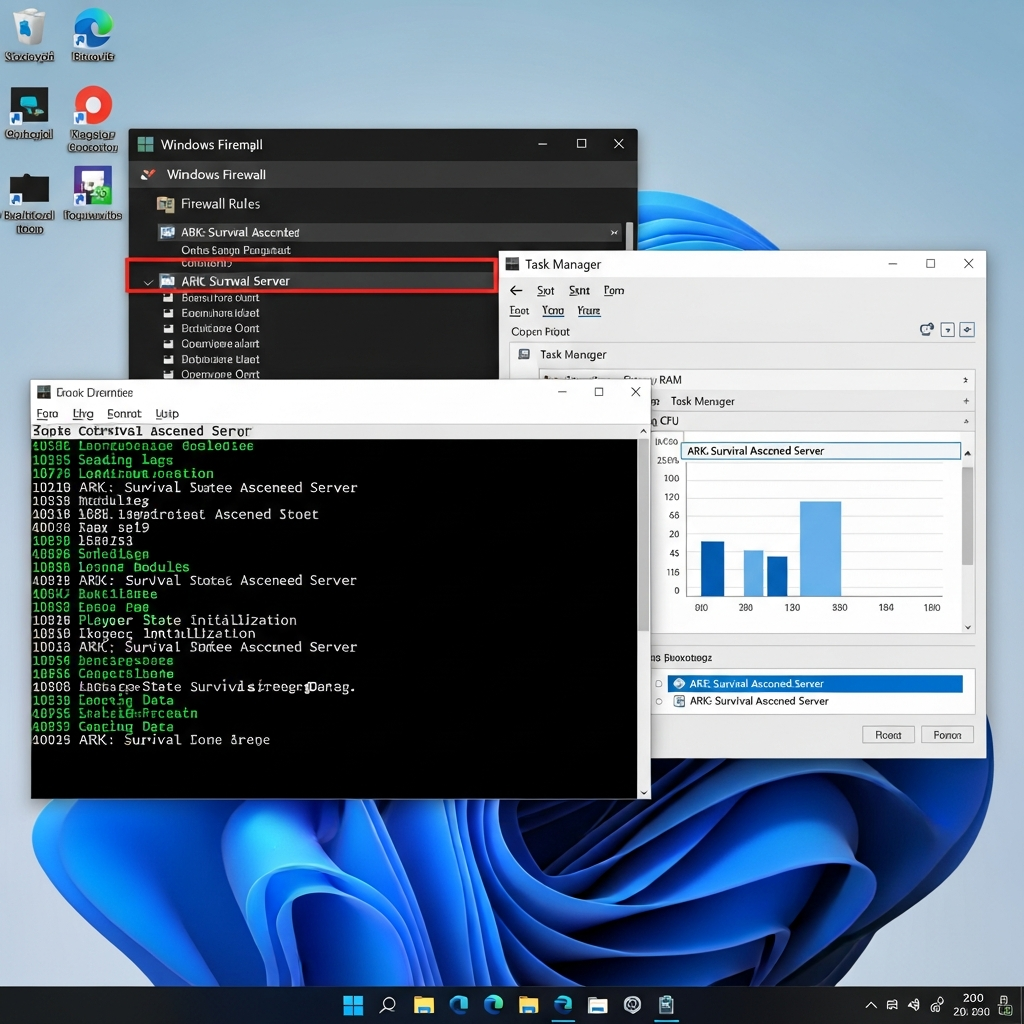
Step 5: Configure Windows Firewall Rules
The ARK SA server requires three inbound ports to be opened in Windows Firewall:
- Open Windows Defender Firewall with Advanced Security.
- Click Inbound Rules → New Rule → Port.
- Select UDP, enter ports
7777, 7778, and name the rule “ARK SA Game Ports”. - Repeat for TCP port
27020(RCON) and27015(Query).
Step 6: Create a Startup Batch Script
Create a file named start_ark_sa.bat in C:\ARKServer\ with the following content:
@echo off
start "" "C:\ARKServer\ShooterGame\Binaries\Win64\ArkAscendedServer.exe" TheIsland_WP?listen?SessionName=MyARKServer -WinLiveMaxPlayers=50 -ServerRCONOutputBuffer=600
exit
Double-click the batch file to launch the server. The console window will display initialization logs. Wait until you see “Server is ready” before attempting to connect.
Step 7: Install Mods and CurseForge Integration
ARK: Survival Ascended supports mods via the CurseForge platform. To install mods on your Windows VPS:
- Browse CurseForge ARK SA Mods and note the mod IDs.
- Edit
GameUserSettings.iniand add theActiveModsparameter under[ServerSettings]:
ActiveMods=928757,891234,923456Restart the server. SteamCMD will automatically download and load the specified mods on the next startup. For advanced setups, consider using the Nexus Games panel integration, which allows one-click mod installation directly from CurseForge without manual INI editing.
Optimizing ARK SA Server Performance on Windows VPS
Once your ARK SA server Windows VPS is live, performance optimization ensures smooth gameplay, minimal lag, and efficient resource usage. Here are the top strategies to maximize your VPS performance.
CPU Affinity and Process Priority
ARK SA benefits from high single-thread performance. Open Task Manager, find ArkAscendedServer.exe, right-click → Set Priority → High. For advanced users, set CPU affinity to isolate the server process to specific Ryzen 9 7950X3D cores:
Right-click ArkAscendedServer.exe → Set Affinity → Uncheck half the cores (reserve for OS and background tasks)RAM Allocation and Virtual Memory
Windows may throttle ARK SA if virtual memory (page file) is too small. Set a custom page file size:
- System Properties → Advanced → Performance Settings → Advanced → Virtual Memory.
- Set Initial Size: 16384 MB, Maximum Size: 32768 MB (adjust based on total RAM).
Network Tuning
Reduce latency by disabling Nagle’s algorithm (TCP buffering) in Windows Registry:
HKEY_LOCAL_MACHINE\SYSTEM\CurrentControlSet\Services\Tcpip\Parameters\Interfaces\{GUID}
Create DWORD: TcpAckFrequency = 1
Create DWORD: TCPNoDelay = 1
Restart the VPS after applying registry changes.
Automated Backups and Update Scripts
Schedule daily backups using Windows Task Scheduler. Create a PowerShell script to zip the ShooterGame\Saved folder:
Compress-Archive -Path C:\ARKServer\ShooterGame\Saved -DestinationPath C:\Backups\ARK_Backup_$(Get-Date -Format yyyyMMdd).zipFor automatic updates, add this to your startup batch script:
C:\SteamCMD\steamcmd.exe +login anonymous +app_update 2430930 validate +quitMonitoring and Alerts
Install RCON tools (e.g., ARK Smart Breeding RCON, Discord RCON bots) to monitor player count, server FPS, and RAM usage in real time. Nexus Games provides 24/7 support and can assist with advanced monitoring setups.
Troubleshooting Common ARK SA Windows VPS Issues
Even with a robust Windows VPS, you may encounter occasional issues. Here’s how to resolve the most common problems.
Server Not Appearing in Browser
Check these items:
- Firewall rules: Ensure UDP 7777, 7778 and TCP 27015, 27020 are open.
- Port forwarding: If behind a router, forward the same ports to your VPS IP.
- Steam Query: Verify
QueryPort=27015is set in GameUserSettings.ini.
High RAM Usage or Crashes
ARK SA can consume 12–20 GB RAM with mods. If crashes occur:
- Upgrade your VPS to 32 GB or 64 GB DDR5 ECC RAM via the Nexus Games panel.
- Reduce
MaxPlayersor disable resource-heavy mods. - Enable
?PreventDownloadSurvivors=Trueto block character uploads.
SteamCMD Login Failures
If SteamCMD times out, switch to a different content server:
@sSteamCmdForcePlatformType windows
set_download_region "US-West"
Mod Installation Errors
If mods fail to load, verify the mod ID is correct and compatible with ARK SA (not ARK SE). Clear the mod cache:
Delete C:\ARKServer\ShooterGame\Content\Mods
Restart SteamCMD and re-download mods
For persistent issues, contact Nexus Games support for expert assistance—our team is available 24/7.
Conclusion
Creating an ARK SA server Windows VPS gives you unmatched control, performance, and scalability for hosting ARK: Survival Ascended. By leveraging a high-performance VPS powered by the AMD Ryzen 9 7950X3D, DDR5 ECC RAM, and NVMe storage, you ensure a lag-free experience for your players. Follow this 2025 guide to install SteamCMD, configure your server, optimize performance, and troubleshoot common issues with confidence.
FAQ
What are the minimum Windows VPS specs needed to run an ARK SA server?
The absolute minimum is 4 CPU cores (AMD Ryzen 9 7950X3D recommended), 16 GB DDR5 ECC RAM, and 50 GB NVMe SSD storage. For 20+ players or modded servers, upgrade to 8 cores and 32 GB RAM to prevent lag and crashes.
How do I install CurseForge mods on my ARK SA Windows VPS?
Add the mod IDs to the ActiveMods parameter in GameUserSettings.ini under [ServerSettings]. Restart the server, and SteamCMD will auto-download the mods. For easier management, use the Nexus Games panel’s one-click mod installer.
Can I run multiple ARK SA server instances on one Windows VPS?
Yes, but each instance requires its own set of ports (7777/7778 for Game, 27015 for Query, 27020 for RCON). Copy the server folder, edit each GameUserSettings.ini to use unique ports, and run separate batch scripts. Ensure your VPS has adequate RAM (64 GB+ recommended for 2–3 instances).