Learning how to create a crafting table in Minecraft is the first essential step every player must master to unlock the game’s full potential. This fundamental crafting block serves as your gateway to creating tools, weapons, armor, and countless other items that transform your survival experience. In this comprehensive 2025 guide, we’ll walk you through every step of crafting table creation, from gathering your first wood blocks to understanding advanced crafting mechanics. Whether you’re starting your first world or setting up a multiplayer server with Nexus Games’ Minecraft hosting solutions, mastering the crafting table is your foundation for success.
Understanding the Crafting Table: Your Essential Minecraft Tool
The crafting table, also known as a workbench in older versions, is arguably the most important block in Minecraft’s entire crafting system. This 3×3 crafting grid expands your crafting capabilities far beyond the limited 2×2 grid available in your inventory. Without a crafting table, you’re restricted to only the most basic recipes—sticks, planks, and simple tools. With it, you unlock access to hundreds of recipes including pickaxes, swords, armor sets, decorative blocks, and complex redstone contraptions.
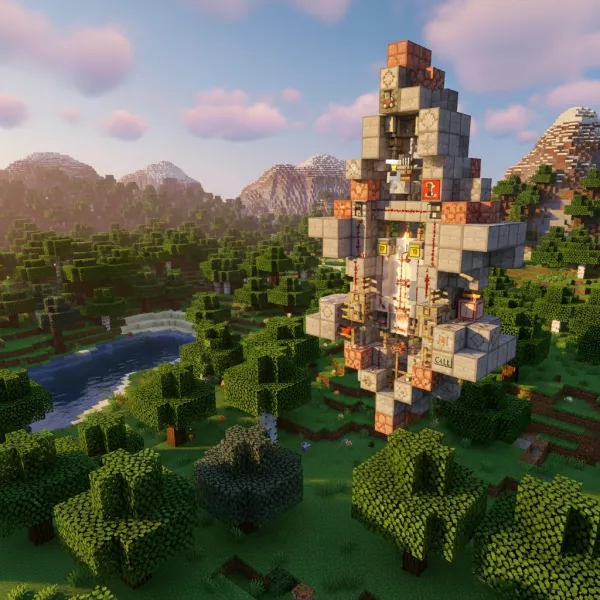
The crafting table’s significance extends beyond just personal survival gameplay. When running a multiplayer server on infrastructure powered by AMD Ryzen 9 7950X3D processors and DDR5 ECC RAM like those offered by Nexus Games, crafting tables become community hubs where players gather, trade, and collaborate on builds. Understanding how to create and utilize crafting tables efficiently impacts your entire gameplay experience, making it a skill worth mastering from day one.
What Makes the Crafting Table Special?
The crafting table offers several critical advantages that make it indispensable:
- 3×3 Crafting Grid: Access to 9 slots instead of 4, enabling complex recipes
- Portable Crafting Station: Can be placed anywhere and picked up without special tools
- No Durability Loss: Unlike tools, crafting tables never break or wear out
- Universal Accessibility: Available from the very beginning of any Minecraft world
- Multiplayer Functionality: Multiple players can use the same crafting table simultaneously on servers
These features make the crafting table the cornerstone of Minecraft’s progression system. Every advanced item—from diamond pickaxes to enchantment tables—requires crafting table access at some point in its creation chain. For server administrators managing communities through Nexus Games’ panel, strategically placing crafting tables in spawn areas or community buildings enhances the player experience significantly.
Step-by-Step Guide: How to Create a Crafting Table in Minecraft
Creating your first crafting table follows a straightforward process that takes less than a minute once you understand the steps. This section breaks down the complete process from gathering materials to placing your finished crafting table in your base.
Step 1: Gather Wood Blocks
Your journey to create a crafting table in Minecraft begins with obtaining wood, the game’s most fundamental resource. Wood blocks (also called logs) can be harvested from any tree type—oak, birch, spruce, jungle, acacia, dark oak, cherry, mangrove, or the various Nether woods. The wood type doesn’t affect the crafting table’s functionality, only its aesthetic appearance in your inventory before crafting.
To gather wood blocks:
- Approach any tree in your Minecraft world
- Face the trunk and hold down your attack button (left-click on PC, right trigger on consoles)
- Continue holding until the block breaks and drops as an item
- Collect at least one wood block (though gathering more is recommended for future crafting)
- Wood can be harvested with bare hands, though using an axe speeds up the process significantly
On multiplayer servers hosted with Nexus Games’ NVMe SSD storage and 1 Gbps bandwidth, tree regeneration and resource gathering occur seamlessly with minimal lag, ensuring smooth gameplay even during initial resource collection phases.
Step 2: Convert Wood to Wooden Planks
Once you’ve collected wood blocks, the next step is converting them into wooden planks. This conversion uses your inventory’s built-in 2×2 crafting grid—no crafting table required yet. Each wood block converts into exactly four wooden planks, providing excellent resource efficiency.
To create wooden planks:
- Open your inventory (default key: E on PC, designated button on consoles)
- Locate the 2×2 crafting grid in the upper-right section of your inventory screen
- Place one wood block in any slot of this crafting grid
- Four wooden planks will appear in the output slot
- Click the output to move the planks to your inventory
- Repeat if you need more planks (you’ll need exactly four planks for one crafting table)
This conversion process is identical across all Minecraft versions, from Java Edition to Bedrock Edition, ensuring consistency whether you’re playing solo or on a dedicated server environment. The planks created maintain the wood type’s color, which affects your crafting table’s appearance until placed.
Step 3: Craft Your Crafting Table
With four wooden planks in your inventory, you’re ready to create your first crafting table. This is one of the few recipes accessible through your inventory’s limited 2×2 grid, making it available immediately upon gathering wood.
The crafting recipe for a crafting table:
[Plank] [Plank]
[Plank] [Plank]
To craft the table:
- Open your inventory crafting grid
- Place one wooden plank in each of the four slots, filling the entire 2×2 grid
- The crafting table icon will appear in the output slot
- Click the crafting table to move it to your inventory
- Your crafting table is now ready to place and use
This recipe is universally consistent across all game versions and platforms. Whether you’re setting up a single-player world or joining a multiplayer server running on Nexus Games’ infrastructure with 16-core AMD Ryzen processors, the recipe never changes, ensuring a smooth onboarding experience for new players.
Step 4: Place and Use Your Crafting Table
The final step is placing your crafting table in a strategic location. Unlike many blocks in Minecraft, crafting tables can be placed on any solid surface and require no special support structures.
To place your crafting table:
- Select the crafting table from your hotbar (the nine slots at the bottom of your screen)
- Position your crosshair on the location where you want to place it
- Right-click (or use your platform’s “place block” control) to set down the crafting table
- The table will appear as a wooden block with tools displayed on its top surface
To use your crafting table, right-click it (or use the interaction button on your platform). This opens the 3×3 crafting interface, dramatically expanding your crafting possibilities. The crafting table remains functional indefinitely—it never breaks from use, only from deliberate destruction. You can retrieve it by breaking it with any tool or your bare hands, and it will drop as an item for reuse elsewhere.
Advanced Crafting Table Strategies and Optimization
Beyond the basic creation process, understanding advanced crafting table usage can significantly enhance your Minecraft efficiency, especially in multiplayer environments or when managing complex builds.
Strategic Placement for Maximum Efficiency
Where you place your crafting tables matters more than many players realize. Strategic placement reduces travel time, improves workflow, and enhances your overall gameplay experience:
- Near Storage Systems: Position crafting tables adjacent to chests containing crafting materials for quick access
- Multiple Locations: Create crafting stations in your mine, base, farm areas, and building sites
- Central Community Areas: On multiplayer servers, place crafting tables in spawn areas or trade hubs
- Alongside Furnaces: Create combined crafting-smelting stations for complete production chains
- Near Enchantment Areas: Position tables near enchanting setups for quick tool crafting and repair
For server administrators using Pterodactyl panel solutions, setting up protected crafting areas in spawn zones ensures new players have immediate access to essential crafting facilities without resource constraints.
Crafting Table Mechanics in Multiplayer Environments
When running or playing on Minecraft servers, crafting table mechanics function slightly differently than in single-player. Understanding these differences helps optimize server performance and player experience:
| Aspect | Single-Player | Multiplayer Server |
| Simultaneous Use | Only one player (you) | Multiple players can access different tables concurrently |
| Recipe Book Sync | Instant updates | Requires server sync (minimal delay on quality hosting) |
| Block Breaking | Instant item drop | Server-validated to prevent duplication exploits |
| Lag Impact | None | Negligible on properly configured servers with adequate resources |
Servers hosted on Nexus Games’ infrastructure benefit from DDR5 ECC RAM configurations that handle multiple simultaneous crafting operations without performance degradation. This becomes particularly important during peak player activity when dozens of users might be crafting simultaneously.
Crafting Table Variants and Alternatives
While the standard crafting table serves most needs, Minecraft includes several specialized crafting stations that extend or modify the basic crafting table functionality:
- Cartography Table: Specialized for map-related recipes and operations
- Stonecutter: Provides efficient stone block crafting with reduced material waste
- Loom: Dedicated banner pattern application station
- Smithing Table: Used for netherite upgrades and armor trimming
- Grindstone: Combines repair functionality with enchantment removal
These specialized tables don’t replace the standard crafting table but complement it. Understanding when to use each type optimizes your crafting workflow and resource consumption. For comprehensive builds or community servers, establishing areas with all crafting station types creates efficient production centers that serve entire player communities.
Recipe Book Mastery
The recipe book feature, introduced in Minecraft 1.12, revolutionized how players interact with crafting tables. This built-in guide appears whenever you open a crafting table and displays all recipes you’ve unlocked through discovering ingredients.
Key recipe book features include:
- Automatic Discovery: Recipes unlock automatically when you obtain their ingredients
- Quick Crafting: Click any recipe to auto-fill the crafting grid if materials are available
- Search Function: Find specific recipes quickly using the search bar
- Category Filters: Browse recipes by type (building blocks, decorations, tools, etc.)
- Craftable Highlighting: Green text indicates you currently have materials for that recipe
This system particularly benefits new players joining multiplayer servers. When you create a server with Nexus Games’ hosting solutions, all players automatically have access to this feature, reducing the learning curve and improving retention rates for community servers.
Troubleshooting Common Crafting Table Issues
Despite the crafting table’s simplicity, players occasionally encounter issues. This section addresses the most common problems and their solutions.
Issue: “I Can’t Place My Crafting Table”
If you’re unable to place your crafting table, several factors might be responsible:
- Insufficient Space: Crafting tables require a full block space; ensure nothing occupies the target location
- Protected Area: On multiplayer servers, spawn protection or claim plugins may prevent placement
- Wrong Item Selected: Verify you’ve selected the crafting table in your hotbar, not a similar-looking item
- Game Mode Restrictions: Adventure mode may restrict block placement without specific NBT tags
- Server Permissions: Some servers restrict crafting table placement to specific ranks or areas
For server administrators using Nexus Games’ panel interface, permission configuration allows fine-tuned control over which player groups can place crafting tables and where, balancing accessibility with protection against griefing.
Issue: “My Crafting Table Disappeared”
Crafting tables can disappear for several reasons:
- Accidental Breaking: Crafting tables break easily; you may have destroyed it without noticing
- Explosions: Creeper explosions or TNT can destroy crafting tables (though they usually drop as items)
- Server Rollback: Server crashes or rollbacks may reset recent placed blocks
- Item Despawn: If broken, the dropped item despawns after 5 minutes if not collected
- Other Players: On multiplayer servers, another player may have removed it
Servers running on Nexus Games’ infrastructure with NVMe SSD storage benefit from rapid backup systems that can quickly restore lost structures, including placed crafting tables, minimizing disruption from technical issues or griefing incidents.
Issue: “Recipes Aren’t Working Correctly”
When crafting recipes fail to produce expected results, consider these factors:
- Incorrect Pattern: Many recipes require specific arrangements; verify the exact pattern
- Wrong Materials: Some recipes require specific material types (e.g., matching wood types for certain items)
- Version Differences: Recipes occasionally change between Java and Bedrock editions
- Mod Conflicts: Custom modpacks may alter or remove vanilla recipes
- Server Configuration: Custom servers might have modified crafting recipes through plugins
When hosting modded Minecraft servers through Nexus Games, the powerful AMD Ryzen 9 7950X3D processors handle complex recipe modifications and custom crafting systems without performance issues, ensuring smooth gameplay even with hundreds of custom recipes added by mods.
Performance Optimization for Large-Scale Crafting
When operating extensive crafting operations—whether in single-player mega-builds or multiplayer server economies—optimization becomes crucial. Players engaging in mass production should consider these strategies:
- Craft in Batches: Prepare all materials before starting to minimize interface opening/closing
- Use Shift-Click: Shift-clicking crafted items moves entire stacks instantly
- Organize Materials: Keep crafting materials in consistent chest positions for muscle memory
- Multiple Crafting Stations: Set up parallel crafting tables for different recipe types
- Automated Systems: For truly large-scale operations, explore redstone auto-crafters (in applicable versions)
These optimizations become particularly valuable on multiplayer servers where dozens of players might simultaneously engage in crafting activities. Nexus Games’ server infrastructure ensures that even during peak crafting activity with multiple players accessing crafting interfaces simultaneously, server performance remains smooth with minimal tick lag.
Understanding how to create a crafting table in Minecraft represents just the beginning of your crafting journey. As you progress from basic tools to complex redstone contraptions and elaborate builds, the humble crafting table remains your constant companion, enabling every advancement along the way. Whether playing solo or building communities on multiplayer servers, mastering crafting table creation and optimization forms the foundation of Minecraft success.
FAQ
Can I create a crafting table without any tools in Minecraft?
Yes, absolutely! Creating a crafting table requires no tools whatsoever. You can punch a tree with your bare hands to collect wood blocks, convert them to planks using your inventory’s 2×2 crafting grid, and then craft the table using those four planks. The crafting table is specifically designed as an accessible first-step item that every player can create immediately upon spawning in any world, making it the perfect starting point for your Minecraft journey.
Does the type of wood I use affect my crafting table’s functionality?
No, the wood type has zero impact on crafting table functionality. Whether you use oak, birch, spruce, jungle, acacia, dark oak, cherry, mangrove, or even crimson or warped wood from the Nether, the resulting crafting table works identically. The only difference appears in your inventory before placement—the crafting table icon shows the wood type you used. Once placed, all crafting tables look the same and provide identical 3×3 crafting grids with access to all recipes regardless of the wood source.
How many crafting tables should I create for my Minecraft base?
For optimal efficiency, most players benefit from having multiple crafting tables in different locations. Create at least one near your main storage area, one in your mine for on-site tool repairs, one near farms for quick food processing, and additional tables in any specialized work areas like redstone labs or building sites. Since crafting tables require only four wooden planks (one log’s worth) and never wear out, there’s virtually no downside to creating multiple tables. On multiplayer servers, community areas benefit from having several tables to accommodate simultaneous player usage without waiting.