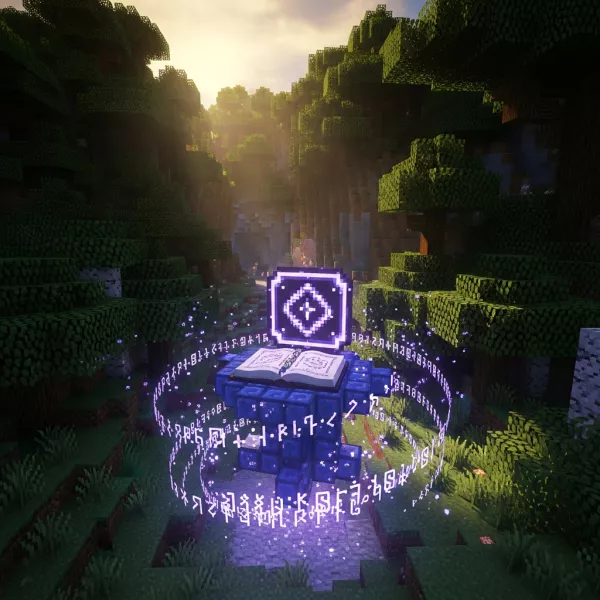
How to Make Potions in Minecraft – Complete Guide
Are you tired of just using swords and axes to survive the night in Minecraft? Do you wish you had a secret edge, a powerful buff to help you explore deeper and fight harder? Forget slow, manual healing and let us unlock the true power of alchemy. Potion brewing is an exciting, essential skill that will transform how you play, giving you abilities like breathing fire, seeing in the darkest caves, and moving at incredible speeds.
If you are ready to become a master alchemist, grab your glass bottle, and let us learn how to make potions in Minecraft.
What are potions in Minecraft?
Potions are special consumable items that apply a potion effect, which can be positive or negative, to a player or mob for a limited time. They are the core of Minecraft’s magic and alchemy system.
Potion brewing is a critical skill because it grants you immense power for survival and combat. Need to dive deep into an ocean monument? Brew a potion of water breathing. Facing a difficult boss or a large group of hostile mobs? You can rely on a splash potion of healing or strength.
There are three main types of potions: drinkable potions (consumed by the player), splash potions (thrown to affect an area or target), and lingering potions (thrown to create a cloud of effect).
Potion Brewing Basics
To even begin the process of making Minecraft potions, you need the right setup and a few key components.
Contents of Brewing Equipment
The heart of all potion making is the brewing stand.
- The Brewing Stand: You craft this essential block using one Blaze Rod and three blocks of Cobblestone, Cobbled Deepslate, or Blackstone. It holds the ingredients and the potions you are working on.
- Required Fuel: A brewing stand requires fuel to operate, and that fuel is blaze powder. You get this by placing blaze rods in a crafting grid, and it is a necessary material for every brewing cycle.
- Essential Base Ingredient: The most fundamental ingredient for the vast majority of recipes is the nether wart. Without it, you are very limited in what you can brew.
- Water Bottles and Glass Bottles: Every single potion starts with a plain water bottle. You can craft a glass bottle from three glass blocks, then fill it by right-clicking on a water source.
Base Potions
Every complex potion begins as a simple, un-effected base potion—the foundation upon which all other power is built.
- Awkward Potion: This is the most important base potion. It is created by adding nether wart to a water bottle in the brewing stand and is the foundation for almost all effect potions.
- Mundane Potion: This mundane potion has very limited uses and is created by adding certain ingredients (like Redstone Dust) to a water bottle without Nether Wart.
- Thick Potion: This is a rarely used base potion created by adding glowstone dust to a water bottle without Nether Wart.
- Water Bottle: The neutral starting point for all brewing; it is an unaffected liquid.
Brewing Method & Equipment
The entire system of potion making is logical once you understand the order of operations.
Brewing Stand Mechanics Explained
The brewing stand has four slots: one for fuel (Blaze Powder), one for the ingredient being added, and three slots for water bottles or existing potions. You can brew multiple potions at once—up to three simultaneously.
Brewing System Step-by-Step
- Fuel Up: Place blaze powder into the fuel slot of the brewing stand.
- Add Base: Place up to three water bottles in the bottom slots.
- Create Awkward Potion: Place a nether wart in the top ingredient slot. Wait 20 seconds. This creates the awkward potion.
- Add Effect: Replace the nether wart with your desired effect ingredient (e.g., Magma Cream for fire resistance). Wait 20 seconds. This creates your final drinkable potion effect.
- Modify (Optional): Add a modifier like redstone dust or glowstone dust for an enhanced or extended potion.
The key is using correctly combined ingredients in the right order.
Key Ingredients for Brewing
These ingredients are the building blocks that determine the power, duration, and type of every potion you brew.
- Nether wart (primary base): Creates the awkward potion, the foundation for all purely beneficial potion effects.
- Blaze rods & blaze powder (fuel): Blaze powder is necessary to fuel the brewing stand.
- Glowstone dust (enhancing strength): Used to increase the strength of the potion effect, creating enhanced potions.
- Redstone dust (extending duration): Used to lengthen the potion duration, creating an extended potion.
- Fermented spider eye (corrupting potions into negative effects): Used to invert or change an effect, creating a corrupted potion like a harming potion.
- Golden carrot (night vision): Creates the potion of night vision.
- Magma cream (fire resistance): Creates the potion of fire resistance.
- Turtle shell (water breathing/turtle master): Creates the turtle master potion.
- Phantom membrane (slow falling): Creates the potion of slow falling.
- Dragon’s breath (for lingering potions): Used only to transform a splash potion into a lingering potion.
Types of Potions
Once you have the awkward potion base, you can imbue it with a wide range of powers.
Drinkable Potions
- Potion of Fire Resistance: Grants immunity to fire and lava for 3 minutes (Magma Cream).
- Potion of Night Vision: Allows players to see in the dark for 8 minutes (Golden Carrot).
- Potion of Water Breathing: Allows you to breathe underwater (Pufferfish).
- Potion of Slow Falling: Reduces fall damage and slows your descent (Phantom Membrane).
- Turtle Master potion: Reduces movement speed but grants a strong defense (Turtle Shell).
- Other purely beneficial potion effects include Healing (Glistering Melon Slice) and Strength (Blaze Powder).
Splash Potions
- What splash potions are: They are thrown versions of standard potions.
- How splash potions are brewed: You add Gunpowder to any brewed drinkable potion effect.
- Common splash potion uses: They are excellent for combat (throwing harming potion), healing allies, and curing zombie villagers.
Lingering Potions
- How to add dragon’s breath to create lingering potions: You take any splash potion and add dragon’s breath in the brewing stand.
- Lingering potion effects and tactical uses: These create a cloud that affects any entity that enters it, making them perfect for creating traps or area denial in combat.
Potion Modifiers
- Redstone dust –> extended potions (longer duration): Redstone dust is used to alter potion duration significantly. For example, Night Vision can go from 3 to 8 minutes.
- Glowstone dust –> enhanced potions (stronger effects): Glowstone dust is used to increase the potency of the effect, but often reduces the duration. For instance, Healing II instantly restores 8 hearts instead of 4.
- Same modifier rules and limitations: You can only apply one or the other; you generally cannot have both a longer potion duration and an enhanced effects potion.
Negative & Corrupted Potions
- Fermented spider eye transformations: The fermented spider eye is the only modifier that can convert a potion’s effect. For example, it turns a Potion of Healing into a Potion of Harming.
- Harming potion and other negative effects: The harming potion instantly inflicts 6 hearts of damage. Other negative effects can be applied this way, like turning a Potion of Swiftness into a Potion of Slowness.
- Corrupted potion outcomes: The fermented spider eye is also unique because it is the only potion that can be brewed by simply adding it to a water bottle to create the Potion of Weakness, a unique and usable negative potion without using nether wart.
Special Potion Mechanics
- Potion combinations and stacking effects: Most positive potion effect buffs will stack with each other (e.g., Strength and Speed), but a stronger version of the same effect will simply replace the weaker one.
- Potion’s base effect and how modifiers apply: You must always brew the base effect before applying modifiers. The Potion of Healing instantly restores 4 hearts, and its enhanced version restores 8.
- Duplicate potions and reverted potions: The game has a legacy of various unused potion ids and rendering potions unobtainable from normal play, but the core brewing recipes remain the same.
Advanced Brewing Tips
- Brewing potions efficiently: Always brew in batches of three! Since the brewing time is 20 seconds per ingredient regardless of how many potions are in the stand, using three water bottles maximizes your output per cycle.
- Brewing method optimization: Have all your ingredients pre-sorted and readily available in a chest next to your brewing stand.
- Mining redstone ore for modifiers: You will need a lot of redstone dust for extended potions, so make sure your mining redstone ore farm is productive.
- Fill infinite glass bottles trick: Bottles can be filled from a single water source block, allowing you to easily fill infinite glass bottles very quickly.
Potion Uses in Gameplay
- Combat strategies with splash and lingering potions: Use a splash potion of Healing to hurt Undead mobs, or a lingering potion of Poison to zone out hostile mobs.
- Survival benefits (fire resistance, water breathing, slow falling): The potion of fire resistance lets you mine directly in the Nether or lava pools, and slow falling can eliminate the threat of fall damage.
- Healing allies and curing zombie villagers: Splash potion of Healing can instantly gain health for a teammate or, when combined with a Golden Apple, is essential for curing zombie villagers.
- Movement speed and fall damage reduction: Potion of Swiftness (increases movement speed by 20% for 3 minutes) allows for fast traversal across your world.
- Gain health and defensive buffs: Potions of Regeneration and Strength provide crucial support for extended fights.
Conclusion
Brewing is a powerful and rewarding system that takes your Minecraft experience to the next level. By understanding the core mechanics—the brewing stand, nether wart, and the function of redstone dust and glowstone dust—you can craft virtually any effect.
Do not be afraid to experiment with potion recipes; try adding a fermented spider eye to a potion you already know to see how it transforms. Mastering minecraft potions will allow you to explore further, fight harder, and survive longer.